Erelijst


.thumb.jpg.3646d60f620cb92f0f2371aad424ae2d.jpg)

Populaire inhoud
Toont inhoud met de hoogste reputatie op 10/30/12 in alle zones
-
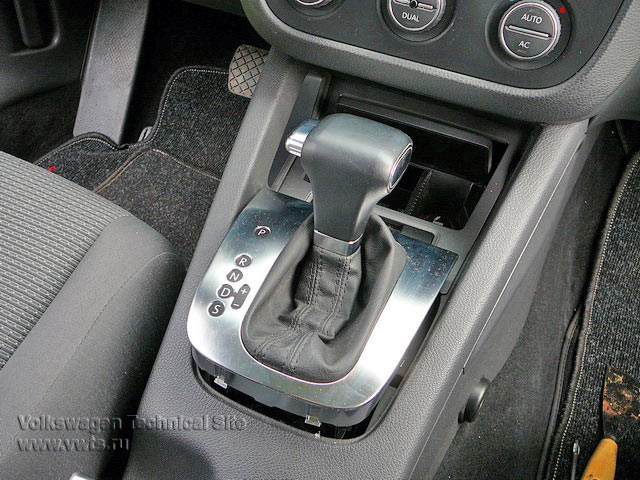
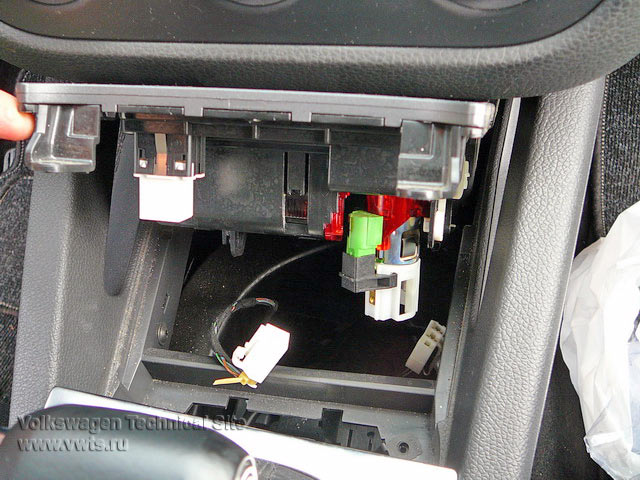
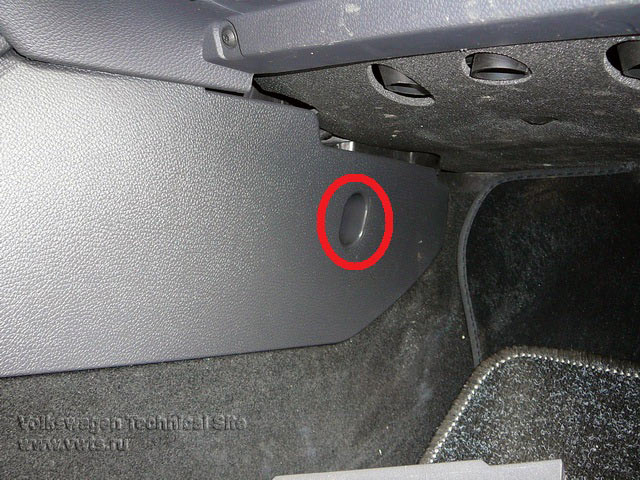
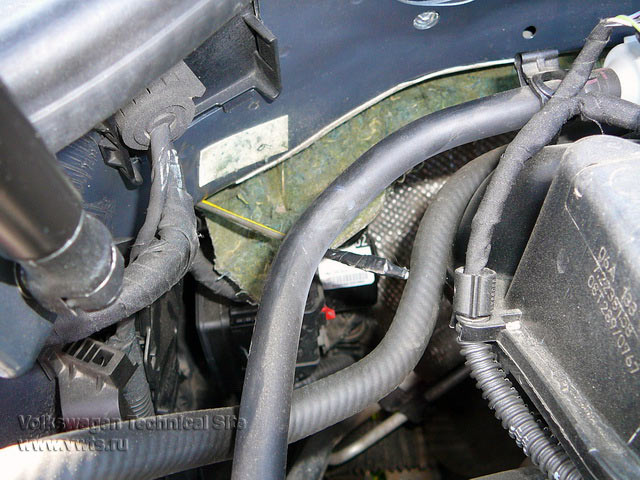
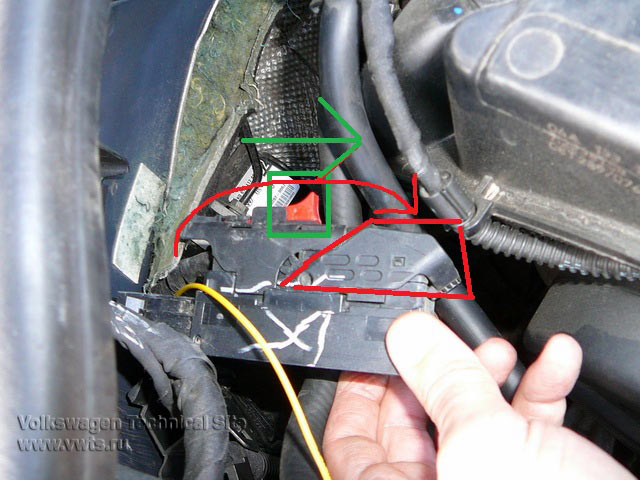
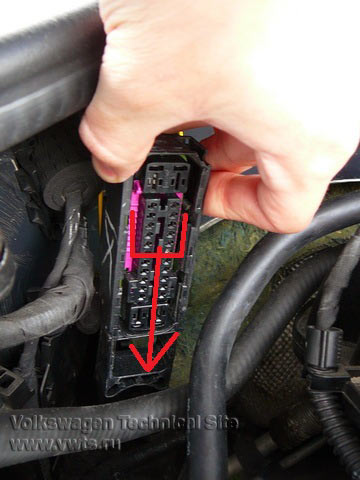
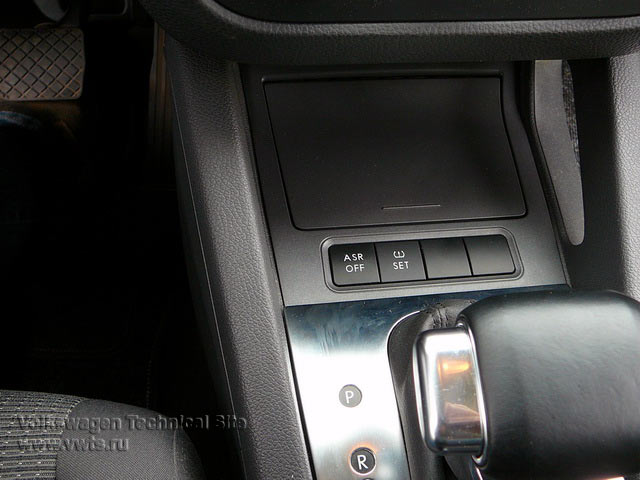
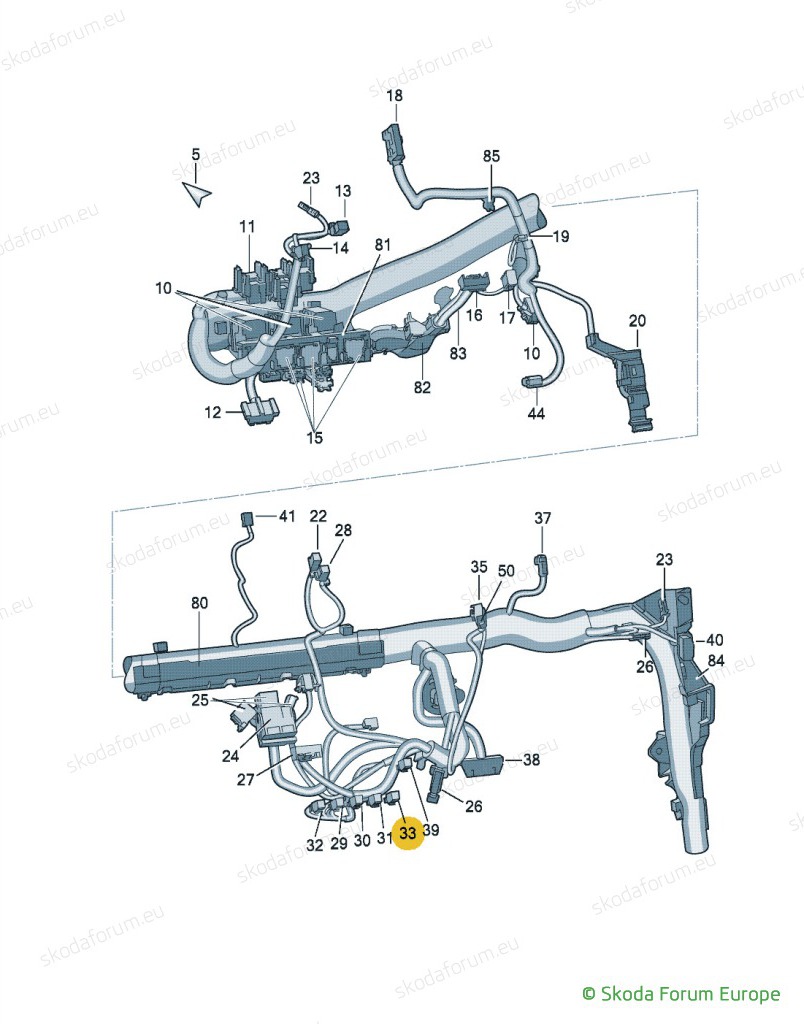
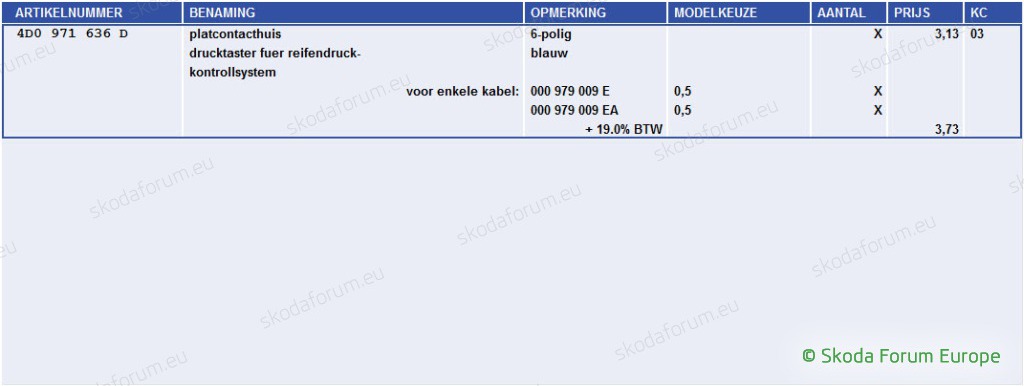
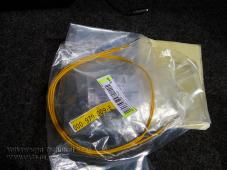
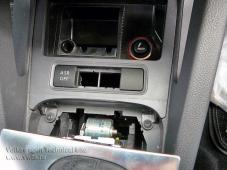
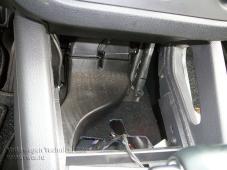
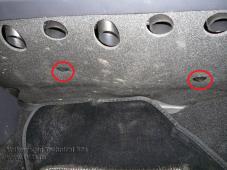
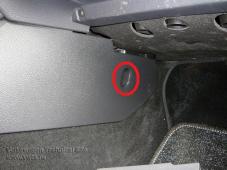
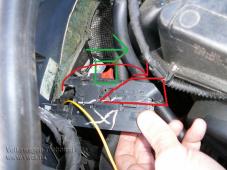
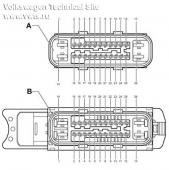
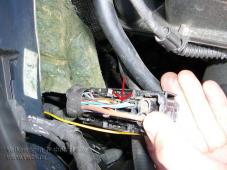
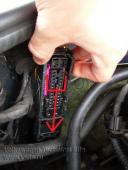
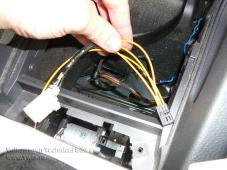
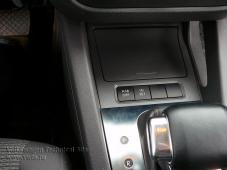
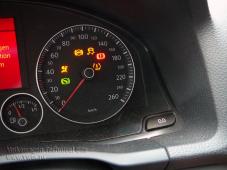
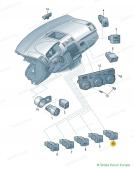
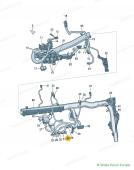
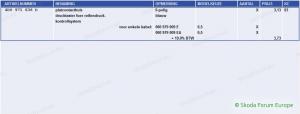
Naar aanleiding van VCDS en de HilHold is er zijdelings gesproken over de bandenspannings signalering en het resetten hiervan. Degene die dit standaard hebben in de wagen hebben massel ( of niet ) Maar in veel uitvoeringen van bv de Yeti is het geen standaard schakelaar Maar onlangs kwam ik erachter dat het bij mijn Yeti ( ambtion uitvoering ) wel met VCDS was aan te zetten. En dan zou het ook moeten werken, alleen bij melding dat je banden zacht / lek zijn kun je dan niet resetten Maar goed Ronald kwam met een link aan van een VW forum waar men dus deze schakelaar zelf heeft ingebouwd en heeft geactiveerd Nu is russisch bij ons allen niet het sterkste punt en heb zodoende google de boel laten vertalen naar het engels. ( nederlandse vertaling werd wel erg gebrekkig nederlands. Dus voor de liefhebber een leuk project voor de kerstperiode Uiteraard zullen de artikelnummers voor de Yeti afwijken of anders zijn. kan me namelijk voorstellen dat de draden als voorbeeld bij de Yeti langer of korter kunnen zijn ( VAG kent geen overlengte ) Dus mocht iemand de juiste Skoda nummers weten te achterhalen..... post ze even hier in het topic ---------------------------------------------------------------------------------------------------------------------------- Reading the information on the installation and operation of this system and decided to install itself. The work is based on the work of the ABS sensors, flat tire makes more turns and notices that system. Given the low cost and the ability to set out the service it was decided to introduce a car. We will need 1. 1K0 927 121 BREH - 750 r. - Sam switch 2. 4D0 971 636 B - 150 rubles. - Connector for him 3. 000 979 009 E - 90 p. Wire in the chip, you need 2 pieces 4. 000 979 150 E - 215 p. Wire in the chip ABS 1 pc. 5. 3B0 972 742 B - 25 p. Wire seal in chips ABS 1 piece Of the tools. Blade screwdriver, a plastic wedge (for isolation panels), Torx 25, a long needle or something like that, electrical tape (recommended 000 979 950 - 290 p / piece). So here we go. 1. De-energizes the auto removal of the clamp from the battery. 2. Plastic wedge otschelkivaem trim handles automatic (for the convenience of silence had to neutral) 3. Under pad see two Torx holding ashtray with button ACP. Turn off and try not to drop the screws deeper. 4. Disconnect the connectors from the ashtrays and buttons ACP otschelkivayutsya elementary with the fingers. 5. Take out the ashtray. 6. Unscrew the two screws holding the plastikvyh soft cover and pull out it. 7. Unscrew the Torx in the side plastic plate, I have not completely removed the wire and so is enough to pave 8. Groping for hulls fan compartment harness leaving the engine compartment through the rubber seal 9. Take the needle, it primatyvaem tape wire 000 979 150 E (the intake can cut it we are no longer useful, and at the same time to fasten the wire seal 3B0 972 742 and is pulled into the engine compartment. I'll be honest this is probably the most uncomfortable occupation was. The result was to push when the needle was at the top with a wire harness. unhooks needle and pulls out her back. Wire sizes are increasing because it is clearly not enough was, at one end of this wire will own terminal, the other terminal with this provodochka 000 979 009 E and it is a chip votknetsya button. 10. Now remove a contact group with the ABS connector. To do this, press the red lock down (note that it has released the top clamp) Then discharged lock down (he will come out of the connector slots) Schematically depicted in the photo is otschelknuty connector with the action. 11. Screwdriver to detach the cover. Looking at terminal seventh pin, pull out the needle from it reinku (or toothpick is pushed to the opposite side) 12. Free the connectors on the terminal, turn the key in the down position After that, insert the terminal in the seventh pin, insert the gasket, cover with a key on the terminal, connect the contact group back. 13. Cut 000 979 009 E in two total should get 4re wires to the terminals. Terminal is connected as follows: 3 track button Sst - 3 track buttons ACP 4 track button Sst - 7-pin on the block abs (which we have stretched from the engine compartment) 5 track button Sst - 4 track buttons ACP 6 track button Sst - 6 track buttons ACP How to connect a button each ACP chooses himself, we can cut the wire, you can kuit and crimp terminals for two wires, which could further option. 14. Fasten with clamps stretched wire, wrapped with electrical tape wires from chips collect. 15. But then we need a VAG-Com or other diagnostic tool. Hooking up, go to the ABS unit - Coding - and subtract from the submitted code 16384 (machine code with the system, tire pressure monitoring). Say what code you need to write, so I will not like the machines of different years of manufacture different residual figure. But subtract 16,834 everywhere (remember, just in case what amount was by default) 16. The plant, rejoice icons appear. On the highway while driving for a second push button icon will flash on the tidy and you will hear a beep, the system placed the adaptation over time adaptation is over and the system goes into operation. ps / for Golf / Jetta 2004-2006 GV to block Mark Teves 60 ABS wire from the button connects the 27 pin. Needed to trigger speed is below 30 km / h


 2 punten
 -
Ik was vroeger autoverkoper...niet verder vertellen hoor hier. Dit bericht verwijder ik weer na 10 minuten, haha!2 punten
-
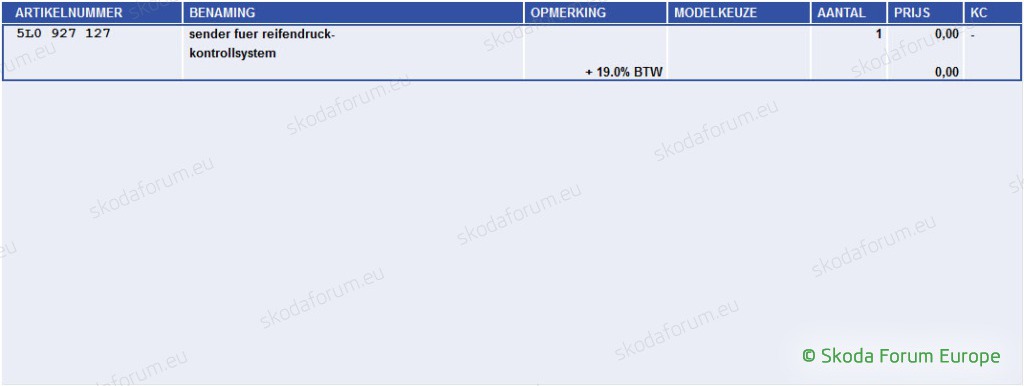
Ik heb er nog even de plaatjes bijgezocht uit ETKA.

 1 punt